

#10
Our top 10 stories for 2015 starts out with Number 10, and is a very cool drone, the story comes to us from Gizmag.com by Nick Lavars
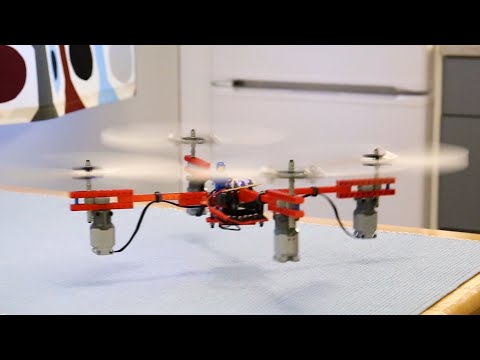
Having already built a pair of industry-oriented drones, Roomba co-designer Helen Grainer’s startup CyPhy Works has made its first flirt with the consumer space with a moderately priced six-rotor drone that takes flight with a swipe of the smartphone screen.
CyPhy Works too is looking to put the intuitive thumbs of iOS and Android users to work. Users can control the CyPhy LVL 1 Drone through simple on-screen swipes, with a first person view streamed back to the user through a Wi-Fi network over an impressive 20 minute flight time.
With six rotors as opposed to the customary four found on most consumer drones, CyPhy says it has designed the LVL 1 so it doesn’t need to tilt in order to move. The company calls this its Level-Up technology, claiming it will enhance handling and allow for smoother, more stable captures.
Photos are snapped at eight megapixels and video shot at 1080p HD. The app also enables users to share these captures over social media platforms such as Facebook, Snapchat or Twitter in real-time while the drone is still in the air.
In keeping with the anyone-can-fly-this-thing mantra, CyPhy has also built in a geofencing feature to give users a little peace of mind. Through the app, a maximum and minimum height can be configured and a geofence created literally by pacing out the boundaries with the smartphone in hand, a feature that’s sure to save a few rotors from the trash heap as users get a grip on things.
for more info visit Gizmag
#9
Taking care of the batteries is of prime concern to most drone pilots. Some of these batteries can be quite expensive and increasing the longevity of the battery will make flying multirotors much cheaper in the long run. So what can be done to increase the life of the average battery pack? Well here is a good article on doing just that. Mike Gantt gives some good tips in this read that should help you increase the life of that vital piece of equipment on your drone. Click on the photo and and find out how to take care of your power packs.
![Power Play[5]](/wp-content/uploads/2015/04/Power-Play5-300x187.jpg)
#8
Flyaway! This little word strikes fear in the heart of the drone operator. When you crash, there are usually parts that can be salvaged to rebuild. But with a real “gone back to China,” never-ever found again flyaway, you are left with nothing—not even the knowledge of what went wrong. Click on image to see more.
#7
This is a video from one of our favorite YouTube video producers, devinsupertramp, every week he posts a new video that covers a wide selection of subjects. This week is the classic story of brother again sister as they grow up, using modern day toys to tease each other. Enjoy the first video and then watch the behind the scenes look at what it takes to produce a video like this. Devon always produces top-quality and fun videos. Enjoy
Check out how this video was made, a nice behind the scenes look
A couple of words from Devin:
Super thanks to Parrot Drones for hooking us up with every drone you saw in the video! Check out their video/channel in the link below!
https://youtu.be/acghGXn5-Vk
Parrot, the French company behind the MiniDrones featured in the video, was the first to bring to a wider public a recreational drone called the AR.Drone back in 2010. Today, they also commercialize the Bebop Drone, a ultra-light drone equipped with a full HD camera digitally stabilized on 3-axes that records videos and pictures in a 180° field with remarkable image quality.
https://twitter.com/Parrot
https://www.facebook.com/Parrot
https://instagram.com/parrot_official
This was one of my personal favorite videos to film. We filmed it over the course of 6 different nights, with not much sleep 🙂 Had lots of people flying the drones who it was their first time flying.
Super thanks to the Trapnell family for letting us take over their house, and for all the kids of the family being so amazing and easy to work with!
Music by Stephen Anderson. He does a ton of the music for my vids, and all his stuff is amazing!!!
http://www.stephenjanderson.com
This was filmed in 6K with the Red Dragon, edited and exported out in Adobe Premiere Creative Cloud.
Edited by Devin Graham in Premiere Pro CC.
Sound Design by Nick Sales! A member of #Teamsupertramp
This film is a fiction work. The presented products shall not be used to threaten or harm humans or animals.
#6
Another way to use drones!
Story by: Adrian Lim

THE Maritime and Port Authority of Singapore (MPA) expects to soon have an extra pair of “eyes” to assess oil spills at sea, in the form of a drone which can be deployed from its patrol boats.
The authority is working with local engineering firm Hope Technik to develop an unmanned aerial vehicle (UAV) that is waterproof and can take off from and land on water. In flight, the drone will be able to “see” for at least 150m around the vessel to which it is tethered.
“Using the UAV, we can have a comprehensive overview of the extent of the oil spill, and we can deploy our craft in a more efficient manner,” said Captain Daknash Ganasen, port master and deputy director of marine operations at the MPA. “From the surface, you have a limited line of sight, but with a UAV you can see further.”
A prototype of the UAV was unveiled yesterday at the International Chemical and Oil Pollution Conference and Exhibition 2015 at the Sands Expo and Convention Centre.
Development of the drone, called the Water Spider, started last year and it will undergo trials at sea soon. Hope Technik expects it to be ready by the third quarter of the year. The drone will cost at least $10,000.
The firm’s project director, Mr Ng Kiang Loong, said the Water Spider’s flying algorithm allows it to fly in gusty winds of up to 20 knots, or 10m per second. A typical drone can fly in winds of up to only 15 knots.
Being able to launch from and land on water is also important, Mr Ng said. Drones require a vertical height clearance of about 5m to take off, and on most vessels, this is obstructed by antennae and masts.
It will be equipped with two cameras – a regular one with a 10x zoom and another with thermal imaging, allowing it to operate into the night. Singapore Oil Spill Response Centre general manager Bas Wiebe said drones can be deployed quickly.
“Overflights by fixed-wing (aircraft) and helicopters sometimes are restrictive because of air space control. Singapore is a small country and you enter quite quickly into your neighbour’s airspace. You may need clearances,” he said.
MPA chief executive Andrew Tan said the UAV is a part of Singapore’s push to be a leader in maritime safety.
The MPA has also started a near-miss reporting system. “For every incident that has happened, there could be several near-misses before that point… We want to understand if it’s a risk relating to passageway or human error,” Mr Tan said.
adrianl@sph.com.sg
– See more at: http://news.asiaone.com/news/singapore/new-drone-give-mpa-better-view-oil-spills#sthash.OjdScPMD.dpuf
#5
First off, we want to point out that it’s actually illegal to shoot down a drone or any flying object, and in some areas, flying over someone’s home is also illegal, so don’t do either of these.
With that in mind, do you think the homeowner’s privacy rights are invaded and he had the right to shoot? Did the homeowner overreact?
Or do you think this is was a set-up and a ploy to get on the news?
All we ask is that you enjoy the video (report) and feel free to leave your comments below.
#4
Although they are very popular now, quadcopters have been around for quite a while. Flying enthusiasts started creating them when the very first gyro came out for RC helicopters. Now, almost every major RC company has at least one model available, while many of them have two or three. Check out any hobby store and you can find them ranging in size from very tiny to rather large, complex flying machines. One of the first mass-marketed quadcopters had to be the Parrot AR.Drone that was revealed in 2010 at the International CES show in Las Vegas. Even the prototype of this quadcopter had a camera mounted inside that allowed the pilot to view the seen image from the You have choices for video and photos, from the left, an iPhone, small video camera or the most popular device, a GoPro. first two groups that are readily available for the average RC pilot. Camera If you opt for the small or mini quadcopters, then you will most likely have a built-in micro camera that can be operated from the transmitter.
Having the ability to get a camera even 10 to 15 feet in the sky creates a whole new perspective on your photographic world.
Many of the newer aircraft are coming with a good to better video camera but the photos are still not up to the best quality, but I am sure that will change soon. If you are just getting into quads and video/photography, this is a perfect platform for you to start with, and they are fun to fly around the house. The larger quads like the DJI Phantom, Blade 350, Dualsky Hornet 460, and the Next Level Multi-Rotors will have a way to mount smaller cameras, which will have to be purchased separately. Some quads in this group come with camera mounts others will have to be purchased separately. The most popular camera would be the GoPro, but if you have any one of the Parrot while flying through a WiFi device. Fast forward to today, and you’ll find that many quadcopters either come with a camera installed or are able to have one of many different types of sport camera and/ or video devices attached to it. Having the ability to take your camera equipment aloft and get photos and video from a bird’s-eye view is perhaps one of the biggest selling points for these four-plusrotor machines. But once you have your flying machine, a second question comes up: what else do you need to know in order to create a really cool photo from your skywards lens? Let’s see what we can do to help you answer that question.Aircraft
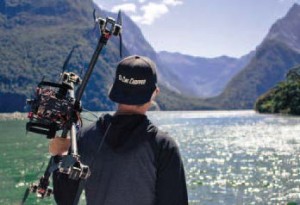
The first thing you need to start your aerial photography is a way to get your camera in the sky. There is a wide array of quadcopter choices, but here are the three main categories. You can get a mini quad with a built-in camera, such as the 1Si from Heli-Max (helimax-rc.com). Most of the time, these will come with a lower-resolution camera built in, but with each new model they keep getting better and better. Some quads can also haul up a GoPro, JVC Adixxion, or one of the Sony Action Cams. These quads include the DJI Phantom and Flamewheel (dji.com), the Blade 350 QX (bladehelis.com), Next Level Multi-Rotors (innov8tivedesigns.com), and the Dualsky Hornet 460 (2dogrc.com). The last “type” of quads are professional models like the DJI Spreading Wings line of quadcopters. These are quads that can take a full-size video or still photography camera aloft. For this article, we will concentrate on the other smaller point-and-shoot cameras, it would be easy to adapt a mount for it. The nice thing with this group of quadcopters is that you can get very high-quality photo and videos. The more money you spend on the camera gear, as a rule, the better your final image will be.
Practice makes perfect, here the
author is practicing flying a drone
without a camera on it in smooth and easy transitional flight.
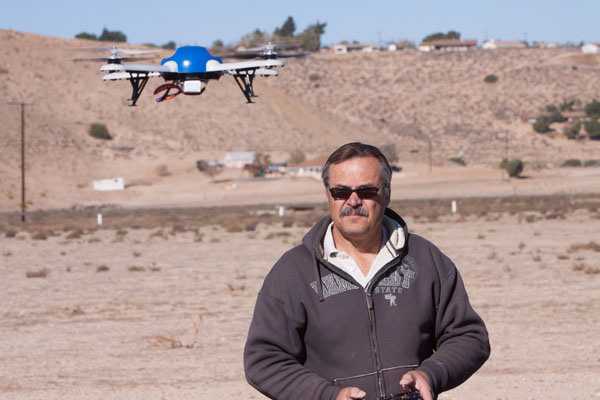
Learning to fly
Before we get into filming from the air, first things first, you have to be able to fly a quadcopter with some authority. Buying a quad, installing a camera, and taking to the air without some practice or instruction is a sure recipe for disaster. Take your time to learn how to fly a quadcopter before trying to film with it. Start with a smaller quad that is made for the beginner pilot, or learn on one of the many flight simulators that include quadcopters with their lineup of aircraft. One of the key points to aerial photography is learning to fly very smooth. Fast radical flying looks cool and is impressive, but makes for some bad video footage.
Fly line-of-sight
Always fly within your line-of-sight as you would with any other RC aircraft. This aspect of the hobby, more than the others, is subject to first-person view (FPV) by attaching a camera that transmits a signal back to a screen or goggles. This allows the pilot to fly the aircraft as if he was actually in it. Once you start flying out of your line-of- sight and relying on the camera transmission signal for guidance, you move your quadcopter out of our hobby’s regulations and into a different realm of rules. Don’t risk your equipment! Fly in your line-of-sight because it is much safer, more reliable, and the responsible thing to do.
Flight times
Make sure you know just how long you can fly, and give yourself plenty of time to get your quad back and landed before using the last bit of battery power. A buffer zone of about two minutes is just about perfect and will always assure that you get the aircraft and camera equipment back home in one piece. In addition, you put less stress on the battery pack by landing with some charge left in the cells.
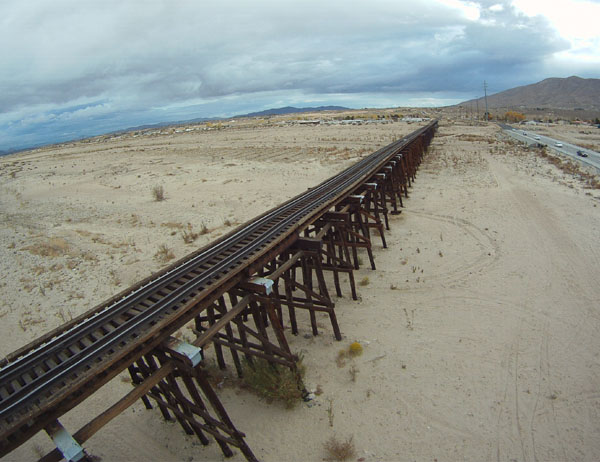
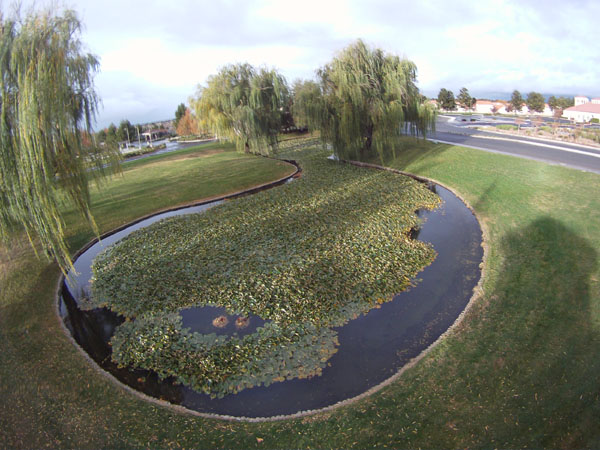
Well-photographed subjects, like this train trestle, takes on a whole different look from a bird’s-eye
perspective.
Shooting video or photos
The way you fly your quadcopter will depend on what you are shooting because video and photos will have different flying styles. For example, if you are shooting video, you’ll want to fly as smoothly as possible. All of your turns will be gentle and slow with little loss of altitude. Fast action flying looks good when watching it with the naked eye, but it does not make for good video. Now, when shooting photos, it doesn’t matter how fast you get the quadcopter into position, or how radical the flight is. All that matters is that you get the bird in shooting location and level out into a solid hover when your shot happens. Once there, you want to stabilize the quad and rotate it into position to frame up the shot — now you just wait for the action. Most aerial photography involves flying fast to a predetermined location, hovering, and waiting for the action to pass by, and then on to the next hovering point.
Great choice for video production is this camera mount that has rubber grommets separating the mounting
platform from the actual quadcopter frame. There is also a separate control for the X and Y axes of the camera for stabilization.

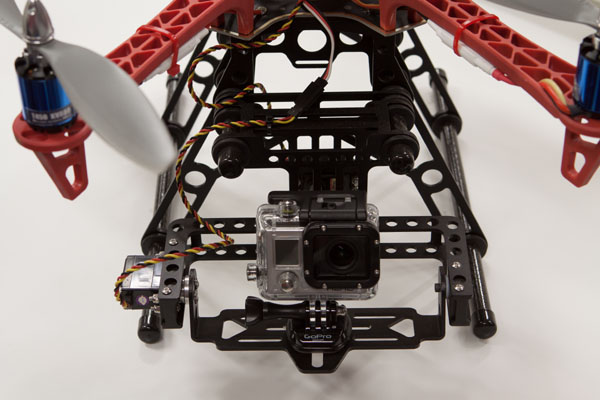
Some quadcopters come with pre-installed camera mounts such as this DJI Phantom.

Hard camera mounts such as this one to the next level quad copter will require some post-processing work to
stabilize the finished video.
Mounting
In most cases, you want to mount the video or photo camera to quadcopters in the same way. Install one of the readily available camera mounts that either come with the quad or are an optional purchase. If you have a choice between a hard or soft mount, go with the soft mount. Shooting photos will work well with either, but a hard mount on a video camera will produce a “jello effect” near the corners of the video. This is caused by the vibration of the quadcopter as it is flying. To prevent this, soft mounts will have some type of rubber grommets between the camera mount and quadcopter. This rubber insulation will reduce the vibration caused by the many moving motors. If you have to make your own mount for your quadcopter, just try to insulate it with some type of rubber between the camera and the mount.
Video tips
• Use a soft mount when installing the camera mount — this will help reduce the “jello effect” from hard mounting the camera.
• Create a smoother-flying quad by setting the controls (if available) to low rates. This will smooth out the flight and create less jumpy video. • Don’t always use GPS mode (if available) on the quad, all of the NAZA controllers have this, and it is a great function for flying. But when that quad comes to a stop, the GPS mode will hold the aircraft in that exact point in space. This is done by making many minute corrections during the flight. Sometimes this movement will be apparent in the video footage (you can fix this afterward).
• Set the video camera to shoot 90 frames per second (FPS) for a really great-looking slow-motion sequence. • Start the video camera before connecting the battery to the quad at the beginning of the flight. After the flight, turn off the video camera after disconnecting the battery. • Any type of stabilizing camera mount (gyro or otherwise) is a real benefit for video shooting.
• Shoot with a wide-angle lens because you will most likely have to use some kind of stabilization program in the post process.

You have choices for video and photos, from the left, an iPhone, small
video camera or the most popular device, a GoPro.
Photo tips
• Hard and soft mounts will work equally well with still photos, but if you plan on expanding to video, and you will, use the soft mount for the same reason outlined in the video tips.
• Learn to fly smooth with extra emphasis on a nice solid hovering that you can do in any direction.
• Use GPS mode for photography because it will keep the bird in the exact location and make flying easier. • The shutter speed on the camera should be set at 1/250 or higher. • Don’t use autofocus and set the camera’s manual focus anywhere above 30 feet.
• Use a wide-angle lens and shoot in the highest format with good resolution. Leave room for post-processing work.
• A camera mount that will allow for the X and Y independent axis movement would be of benefit for photography.
Post-processing for video
Now that all the video is shot, the next step is to process it through an editing program. Almost all of them will do a good job at editing, so pick the one you like to work with best. You do want to utilize some type of stabilization program for your footage. Stabilization programs (often included with video editing programs) will focus on one solid point throughout the video and stabilize everything else around that. This will help smooth out any erratic flight movements or shaking footage. In order to do this, each frame is positioned slightly different and the edge of the frame will look ragged, so in most cases you will have to crop the image to clean that up. This is one reason why it is good to shoot with a wide-angle view, so when it comes time to do post-processing you have the room to crop in on the video.
Final notes
This is a very brief introduction to aerial photography using quadcopters. But, this should give you enough to work with so that you can start filming from the air and getting those cool bird’s-eye view shots to add to your video or photography work. Of course, this is only the tip of the iceberg as to what is available out there for combining quadcopters with video/photography. Once you start, you will find that you’ll want to keep shooting all the time. Just remember to fly safe and smooth, and enjoy!
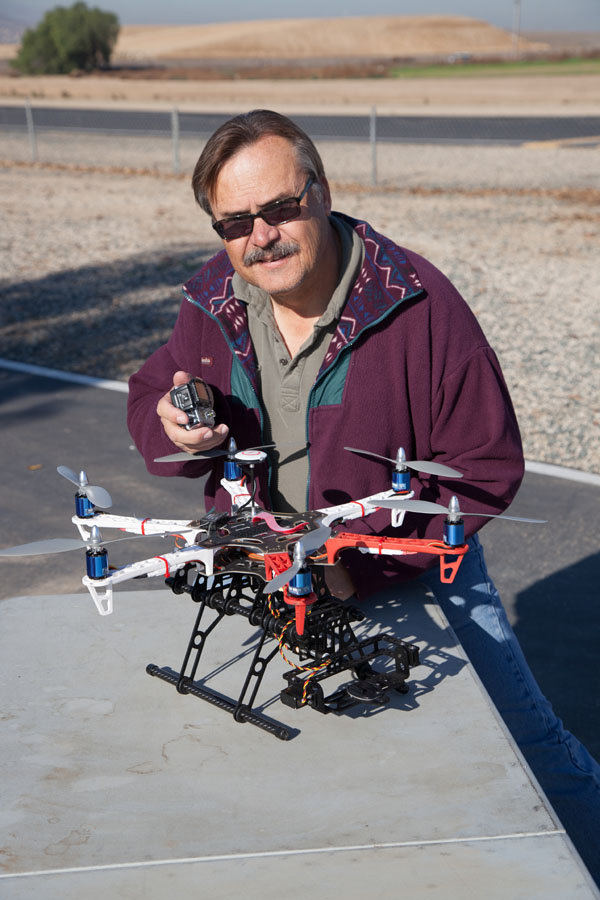
Here the author is detting ready to do some aerial photography by
attaching a GoPro camera to the
front of this DJI Flamewheel 550.
Love of Flying and Photography/Video
By John Reid Senior Editor/Instructor/ Photographer
I was lucky enough to realize at a young age that there were two things I enjoyed doing: RC planes and photography. In fact, I started doing both of them when I was in high school. My first avenue of employment was as a freelance photographer for 28 years. During that time, I was doing some one-day seminars at a local college and in 1999 was offered an adjunct faculty position as a photography instructor. Some of the classes I have taught over the years include introduction to photography, wildlife/nature photography, commercial photography, Photoshop, portrait photography, and studio and lighting photography. In 2000, I decided to combine both loves and submit an article on RC combat to Model Airplane News. It was accepted and led to other freelance work including airplane reviews. In 2002, I was offered a full-time position, which I immediately said yes to before they had a chance to change their minds. From then on, I have been living the dream, working for a great company, with some of the best people in the business. I start each day by writing and photographing everything RC and immersing myself in the lifestyle that is radio control airplanes. Then at night, I teach all aspects of photography to people who share the same passion about it as I do. Armed with this knowledge, it came as no surprise that I would immediately be drawn to quadcopters. After all, I just can’t get enough of having a solid platform to haul my cameras into the sky for an aerial view of the world. It doesn’t get better than this!
#3
While on location for an upcoming RotorDrone Magazine article, we got to capture some great footage of our race pilots flying through some very small openings. However not all flights end successfully as evident by this short video clip. This was the first and best crash of the day, at least voted by the other pilots. But notice at the very end of the clip even after a disaster like this, the other pilots are figuring out who’s going next through that window. Enjoy
#2
The BBC posted this moving — even hauntingly beautiful in its own way — footage of the Auschwitz concentration camp as it appears today, some 70 years later. Beyond the historical significance, this footage gives us a look into how multirotor aerial video platforms are giving audiences spectacular and unprecedented visual access to landmark sites. Heretofore impossible angles and closeups can be filmed without disturbing the sites themselves, helping to both document and preserve them for future generations.
#1
Our #1 story of the year, Have a Great New Year!
File this under “No way!” A drone captured Michal Kollbek’s incredible thrill ride along the White Line in Sedona, Arizona. Our thanks to videographer Marshall Mullen for sharing this on YouTube!