


Generally speaking, I always thought of selfies as being harmless fun. However, the idea of people becoming obsessed with the manufacturing of their own self-portraits came across as somewhat narcissistic. Because of that I always steered away from taking pictures of myself, and never in a million years would I have imagined writing a feature on taking selfies—yet alone this one. So if you’re wondering what inspired this article, it emerged from a moment I flicked through a web link featuring some of the world’s most powerful drone pictures. There were a couple of images exhibited there that lured me into exploring this avenue. A common theme among these images was that they were not just top-down aerial pictures taken with a drone; they managed to incorporate the photographer into the picture as well.
After looking at these images a little more closely, I found that the key element to achieving this dynamic was in the way the photographers had crafted themselves into the frame. This provided the image with an immense sense of intrigue as well.
I finally decided to take my DJI Mavic Pro out to a few locations that I thought would have great potential for taking drone selfies. All shots on display here were taken with the Mavic in auto mode. It was also fitted with a PolarPro Circular Polarizing Filter to help reduce any harsh reflections and highlights.

Western Sydney, New South Wales, Australia
f2.2—1/150s—ISO 100
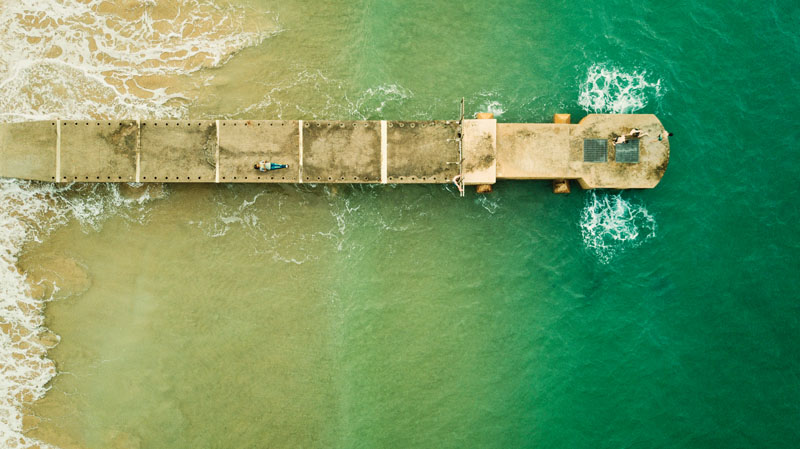
With this lake and wharf, my intention was to capture a bold and contemporary composition, so I elevated the drone to about 80 to 90 feet. This enabled me to fill the frame, with approximately a third of its surface area being taken up by the wharf, which I though provided a nice visual balance.
I also decided to stand in this picture to provide a focal point. The late-afternoon sunset provided some beautiful light and shadows, which assisted in breaking up the bold composition by adding some finer detail.

Northern Beaches, New South Wales, Australia
f2.2—1/25s—ISO 255
The chance to capture an abstract and somewhat bold composition here only required me to elevate the drone to approximately 30 feet high. Keeping the drone relatively close to the ground helped me keep out parts of the scene that I did not want to incorporate. I framed it in a way to capture two sides of water and enough of the concrete slab to exhibit the numbers that would help the viewer identify the subject. The numbers also play a part in providing secondary focal points.
Benefits of Including Yourself
When it comes to composition, including yourself won’t just assist in providing the viewer with a sense of scale and dimension. It will also build more points of interest and add substance to images that are typically only composed of sparse geometric masses. Another benefit is that it could act as a primary focal point or allow you to tell a story using an image.
Top Five Selfie Drone Tips
• Scout your location. Use maps to scout your location before hiking out.
• Look for contrasting colors and textures. Combine interesting colors and textures in the landscape to create interest.
• Seek out focal points. Look for spots in the landscape where you can position yourself and other people.
• Start low. Keep the drone flying low and gradually elevate its height.
• Take shots at multiple heights. Capture numerous photos, and pick the best later.
Northern Beaches, New South Wales, Australia
f2.2—1/50s—ISO 190
To achieve a sleek and contemporary composition here, I flew the drone to a height of approximately 130 feet and positioned the horizontal axis of the concrete plinth a little off center and more toward the top part of the frame. I also took the drone to this particular height so that I could capture all the color tones in seawater below. Lying down was the preferred option as the viewer is more easily able to identify me here. Having captured the swimmers about to jump into the water also assists in providing an interesting secondary focal point.
Western Sydney, New South Wales, Australia
f2.2—1/13s—ISO 547
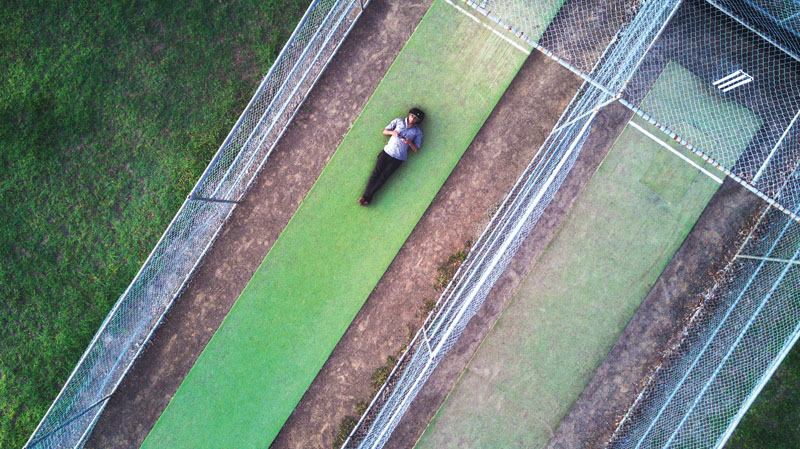
Shown here are the training nets from my junior sporting cricket days. Until now, my only views of this were from ground level during my training days 30 years ago. I took the drone up to about 30 to 45 feet high and decided to explore the site from an aerial perspective, mainly because of the interesting layers it contained. I also kept the drone at this low height to reveal the interesting textures of the steel mesh fence, concrete slab, dirt, and grass on the sides.
I positioned the drone in such a way that the stumps were revealed in the far right corner. Making the stumps visible not only enabled a secondary focal point but also helped the viewer identify the scene as being a cricket training pitch.
Western Sydney,
New South Wales, Australia
f2.2—1/370s—ISO 100
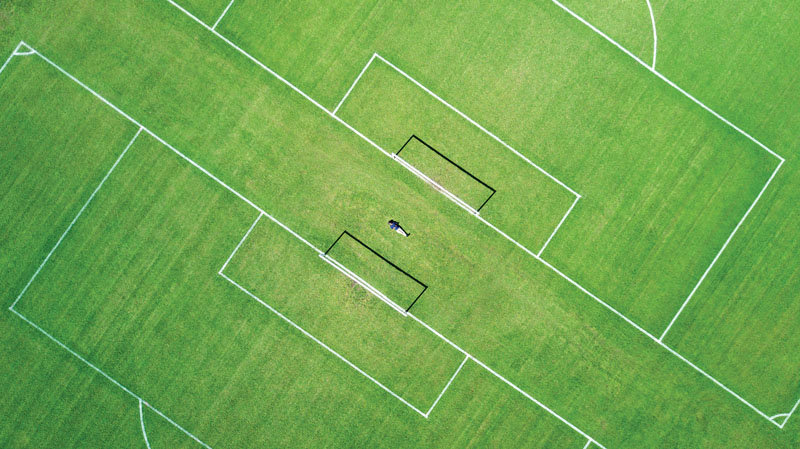
This scene presented me an opportunity to capture the geometric, stark white lines against a lush green football field in a unique way. Taking the drone up to about 150 feet high was ideal in capturing enough of the radial and rectilinear geometry of the chalked sidelines.
I also limited the drone to that height so that my presence wasn’t too small and diluted within the overall scene. Turning the drone so that the two football fields were approximately 45 degrees to the horizontal frame added a much stronger sense of movement as well.
When and How to Include Yourself
Given the fact that most of top-down aerial photos are abstract in nature to begin with, it makes perfect sense to add in a focal point as well. Remember that you don’t just need the one focal point. If you decide to shoot in a similar style to what I have, try to strategically seek out more focal points where people could be incorporated.
Seeking a place to locate yourself within a composition is quite simple; you only need to find that primary focal point in which to add yourself. Once you’ve found that, think about how you would like position yourself (whether to sit, stand, or lie down, for example). Lying on the ground gives the viewer an unusual perspective that dramatically adds to the subject’s sense of scale.
Start flying the drone at the lowest level and then slowly move upward. Always check your image display, and carefully observe how increasing the height affects your composition.
Don’t become obsessed with getting too much elevation as this can somewhat diminish the selfie-style image you are trying to create. Just to be safe, I usually shoot at three different heights and then choose the most suitable composition when I am editing my RAW files into JPEGs


Thanks for the article, I’m doing a self portrait assignment for my Photography Uni degree and I have been working on a series of aerial self portraits. This article has given me some great ideas and guidance.