
We’ve all seen the ads. You know, the ones that get you excited about owning a quadcopter and shooting your own aerial videos or pictures. They usually bear the logo of DJI, GoPro, Parrot, 3DR or some other drone/sports camera manufacturer. And the images look AMAZING.
So you buy it. You try it at home. But the result is not quite as good as advertised. Did you fall victim to misleading advertising? Well, yes and no. Although it is possible to get great-looking images with a low-cost sports camera, it takes some know-how and practice. I’ve asked the pros, and here are their best tips. Obviously, you can always upgrade your hardware with a brushless gimbal, a better lens, a better camera; those will all radically improve your image. But the following tips won’t require a credit card.
SUNGLASSES ON SUNNY DAYS
Cameras need sunglasses, too. If you’re filming over a lake or anywhere the camera is subjected to a lot of reflected light, you should use a polarized filter. This tip comes from Patrice Larose, rental and professional video director at Lozeau camera store. “The polarizer will cut some of the light,” he explains, “but only the undesirable reflections. This will allow us to get a lot more detail out of things like snow, without blocking all the rest of the light in the image.”
Circular polarized filters are usually sold mounted on a lens ring. Some are available for sport cameras. But don’t buy the thin flexible polarizing films. Those are meant for lights.
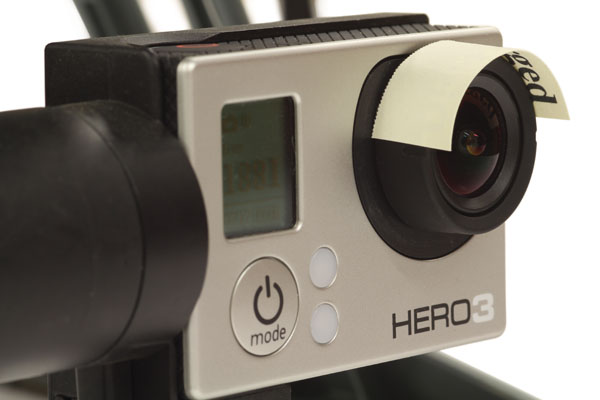
You can make your own cheap filter by hacking 3D glasses from the movie theatre. Don’t steal—ask nicely and they may let you have a used pair from the recycling bin. It worked for me. Rip out the filter, flip it around, cut it to the size that you need and make sure it’s oriented the right way. It won’t be as good as the real deal, but it works.
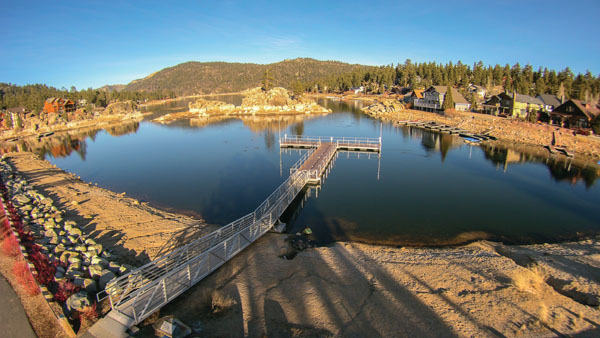
Using a polarized filter may reduce glare and improve image quality, especially over bodies of water.
DON’T SANDBLAST YOUR LENS
Propellers lift a lot of dust during takeoff and landing, and those particles can hit the lens at high speeds and make minuscule scratches. Over time, your image will get blurrier and blurrier. You can point the gimbal upward to reduce the risk, but that’s not foolproof.
Pros carry a tarp and lay down a takeoff and landing safe zone. Put something heavy on each corner so it doesn’t catch in the wind. Chuck Taylor, vice-president of SkyMotion Video, told me that he uses a special kind of “one-way” mat originally developed by the military for helicopters but is now commercialized by Hammacher Schlemmer and sold as a beach mat. “Basically, sand will fall through the mat, but it won’t come up,” he explains.
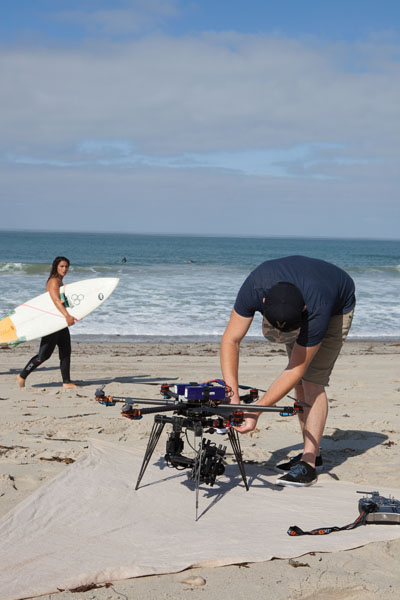
Never go to the beach without a tarp. The propellers would lift a sandstorm that can ruin a lens.
IF YOU SCRATCH, IT YOU LOSE IT
Another option is to put something in front of the lens. Online stores sell clear protective filters specifically made for the most popular cameras. Otherwise, you can buy a thin sheet of acrylic (Plexiglas) or polyurethane (Lexan) at a hardware store or from a window specialist for few bucks and cut it into small squares. They scratch easily, but you can replace them as needed. You also get the added benefit of protecting the lens in case of a rough landing.
VIBRATION IS THE ENEMY
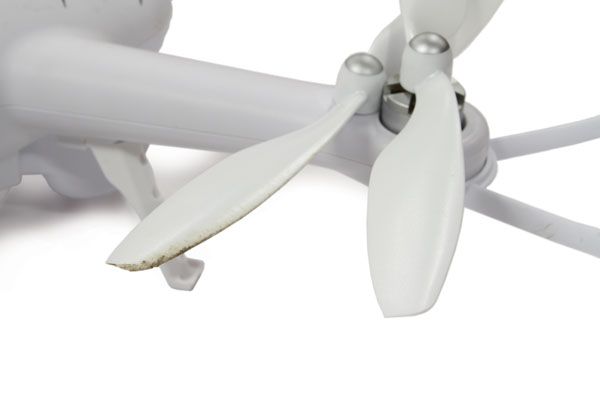
According to our specialists, most issues plaguing new pilots are caused by unnecessary vibration. Johan Lassalle, president of DroneXperts, is categorical: “Propellers are your most significant source of vibration.” Check that they’re balanced. Most brand name propellers are, but cheap replacements bought on the Internet might not be. Dirty, damaged or chipped props will also produce more vibration. “If you use a propeller that took a hit, that will undoubtedly cause vibrations,” says Lassalle.
For his part, Larose recommends checking for loose screws, and making sure that the camera is properly attached to the gimbal. Gimbals do not like stuff dangling or pulling on them.
RUBBER DAMPENERS CAN FREEZE
If you bought a DJI Phantom with a gimbal, you probably noticed that you have three sets of rubber dampener balls in the kit. Those are not replacements sets. Lassalle explains that each one has a different softness: the stiffest are for hot weather, and the softest are for cold weather. The wrong dampeners will harden at low temperatures and that can render them useless.
GIVE FISHEYE THE STINK EYE
Most sports cameras have a fisheye lens that distorts your image, curving the horizon, roads and buildings. There are a few ways of fixing that.
If you’re not too shy about opening up your camera, you can install an aftermarket lens. You can learn how by searching on the Internet. Be warned: some of those lenses can cost upward of $100. Make sure you focus the new lens perfectly.
Otherwise, some cameras may offer a “narrow field of view” recording mode which can help. But that will reduce the resolution.
You can also use software to correct the image. There will be some loss of quality and blurring, since that means warping the image, but results are generally satisfactory.
You can do this in After Effects or Photoshop. Many editing software now come with pre-sets for the most common cameras. But if you’re looking for free software, try GoPro Studio. It comes with an easy-to-use, one-click, fisheye-removal tool.

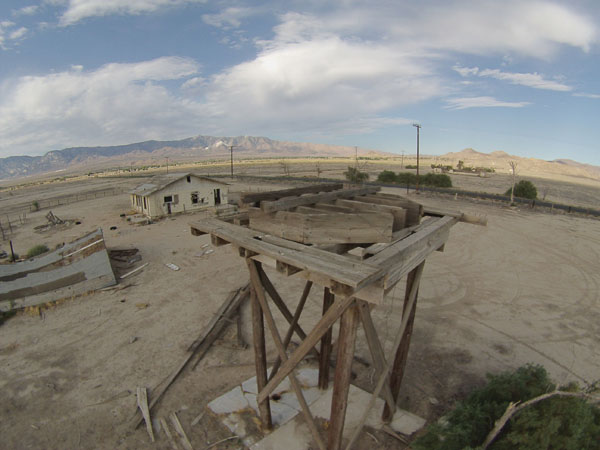
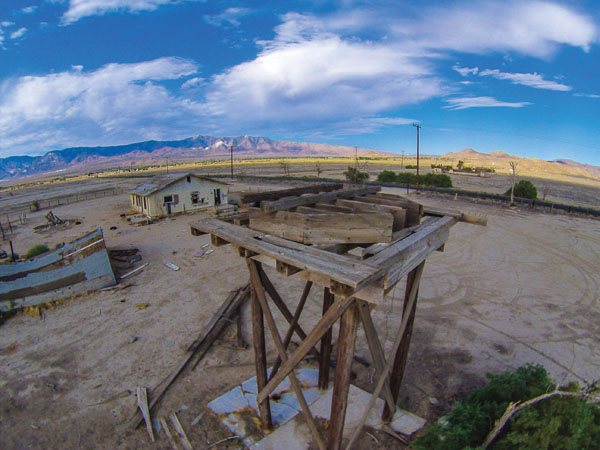
NO DISTORTION.
A single frame of video shot with a GoPro Hero3 Black, before and after applying a fisheye distortion correction with GoPro Studio.
FISHEYE DISTORTION
BE A SETTINGS NERD
This is so basic, it should be number 1. Are you shooting at 720p with a camera that can do 4K? You could be recording in RAW mode but don’t use it? Did you check your focus? Did you turn on optical image stabilization? Getting to know your camera is key if you want to get the most out of it. Watch tutorials and read the manual. That camera may be better than you think.
The same goes for your aircraft. “Factory settings will not always work for everyone,” says Lassalle. He suggests reducing the gains on your flight controller to get smoother motion. Just be careful not to reduce them too much at once or you risk losing control.
A damaged propeller will cause unwanted vibration in the airframe. Replace it with a new one and make sure it’s properly balanced.
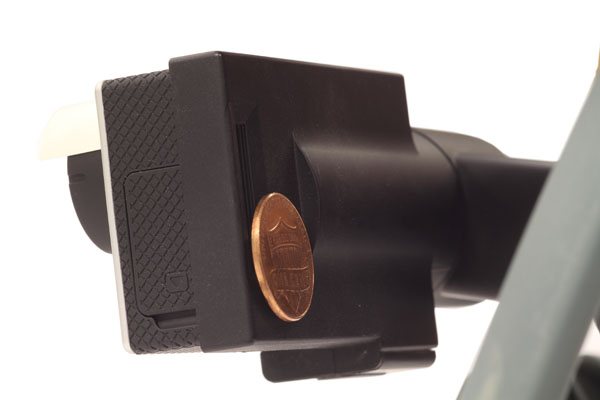
THE BALANCING ACT
Filters and a hood will make your gimbal front-heavy. Rebalance it by gluing a coin or metal washer on the backside. “A gimbal that’s working too hard is another common cause of shaky video,” says Larose.
HARNESS THE POWER OF THE SUN
If you’re filming a building or landscape, figure out what time of day the sunlight will be shining on the side that you want to shoot. Direct sunlight means more contrast and a livelier picture. Cloudy days are flatter because of the lack of highlights. In cinema, lighting a shoot is as important as framing it. The most important light source for aerial video is the sun, so learn to use it.
And be careful not to have the shadow of your aircraft in the shot … that never looks right.
Be aware of the angle of light and the shadow cast by your drone. Light coming from the side at a 45-degree angle works well for most landscapes and keeps your drone’s shadow out of the image.
YOU ARE A LEAF IN THE WIND
Flying against the wind will increase turbulence and shake the camera in a way that even a gimbal and vibration dampeners can’t cancel out. For minimum shakiness, turn off your multirotor’s GPS, fly only with the attitude stabilization, and ride the wind like a wave. This technique can be used to create smooth lingering shots in motion, even in windy conditions.
If you don’t have a gimbal, you can use this trick to get a smooth “gliding” shot. In calm weather, move your multirotor in one direction, and then let go of the sticks so it will level itself and “slide.”
FLY IT LIKE YOU MEAN IT
But not all shots have to be slow and lingering. Some of the most impressive drone-made aerial videos incorporate complex travelling motions. Be creative! Plan your shot before takeoff and don’t be afraid to practice your motion a few times. Just remember to fly safe and that depth perception is non-existent beyond 30 feet. Don’t go slamming into newlyweds or buildings … YouTube already has plenty of those videos.
Remember that you can speed up the video in your editing software afterwards to give the impression that you were flying faster than you actually were.
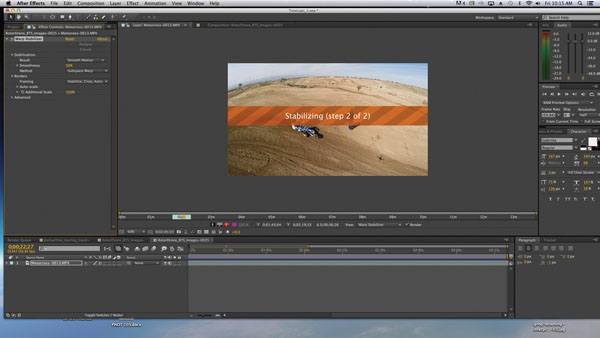
Most commercial video editing software offers some form of digital image stabilization. But beware: it’s a CPU intensive, time-consuming process.
IMAGE STABILZATION FOR THE MASSES
You can do some post-production image stabilization with most editing software like Adobe Premiere, Final Cut or Sony Vegas, but After Effects is the undisputed king in that department.
If you’re looking for a free solution, try DeShaker, a plug-in for Virtual Dub. It’s more complicated to use, but it works. YouTube also has a built-in automatic stabilization feature, but I would not recommend using that. It usually makes a mess. Remember: software image stabilization is NOT a substitute to a good brushless gimbal or vibration dampeners.
PRACTICE THE ART OF COLOR GRADING
Rarely do professionals broadcast a picture or video without retouching it first. Color grading, as it is called, is an art form onto itself. But even just a little work, like adjusting the white balance, improving the contrast and vibrance, can make a huge difference.
Most commercial cameras do an automatic image correction as you shoot. This process can make you lose some image data and reduces your post-production options. If your camera allows you to shoot in RAW mode, use it. The RAW mode on the GoPro may look blurry. Just add some sharpness after grading.
For professional-level color grading, Taylor recommends Blackmagic’s DaVinci Resolve, which is an amazing tool and available as a free “lite” version.
Good video editing software will have several color-correcting tools. GoPro Studio also does some basic color grading and can be a decent —and free—alternative for beginners. For pictures, use Photoshop or GIMP (free). The process of color grading can be complex and subtle, so you’ll have to experiment and watch tutorials.
BEFORE COLOR GRADING
Recording in raw mode on a GoPro Hero3 Black, this is what the image looks like before and after color grading.
AFTER COLOR GRADING
WHY DOES MY VIDEO LOOK LIKE JELLO?
The “jello effect” is caused by the rolling shutter of your camera when it is subjected to vibrations or fast movement. Cameras with a rolling shutter capture an image by scanning the field of view from top to bottom. This process takes only a fraction of a second, but if the vibration is intense, like in the case of electric motors, these tiny, very rapid movements create distortions during the scanning process. Adobe Premiere and After Effects have a Rolling Shutter Repair tool, but it is time-consuming to use and results may vary. The only sure-fire way of preventing the “jello effect” is to use vibration dampeners.
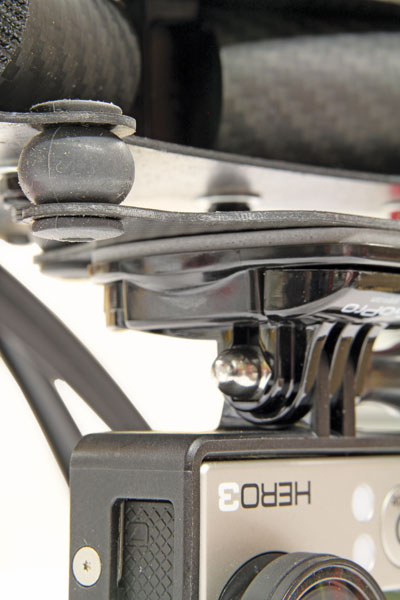
Common vibration dampeners.
DRESS IT UP WITH A NICE HOOD
On sunny days, you may sometimes notice that your video has dark horizontal stripes that move from top to bottom. You won’t notice them on a still picture, only in video. Those are caused by the shadow of the front propellers of your multirotor falling on the lens. If the position of your aircraft relative to the sun is just right, this shadow will “strobe” and the rolling shutter will create scanning lines in a process similar to the “jello effect.” This artifact is impossible to remove in post-production.
Your camera needs a hood, like a little baseball cap. If you’re using a DSLR or mirrorless camera, you can buy a standard camera lens hood. For a sports camera, you can easily make your own.
Even something simple like this business card stock taped down on the lens will work as a hood.
By William Levasseur | Photos by John Reid