
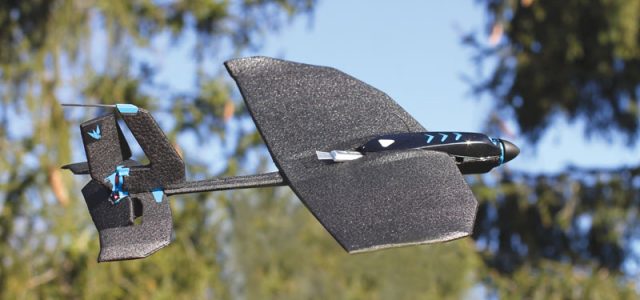
The SmartPlane Pro FPV represents a blend of cutting-edge FPV tech with a traditional winged park-flier airframe and smartphone control interface to create a new kind of flying experience. Constructed primarily out of Durinum, a high-tech foam, the SmartPlane Pro comes completely assembled and includes everything you need to get in the air.


Drone Review: TobyRich SmartPlane Pro FPV – at a glance
Highlights
Included in the set is the plane itself—a conventional high-wing 3-channel monoplane driven by a single propeller in the nose, powered by a geared micro motor—fully assembled, along with a viewscreen that connects to the FPV camera mounted in a pod under the fuselage. That screen can be inserted into the included headset to be worn as FPV goggles. The flight battery slots directly into a port on the top of the plane between the wings, and the rudder and elevator surfaces are controlled by magnetic actuators. The screen and the flight battery (a 3.7V 185mAh LiPo) are charged via conventional USB ports using included adapter cables. There is no controller; the plane is controlled using an Android or iPhone smart device and a freely downloadable SmartPlane Pro app. Flight can be accomplished using the phone’s internal gyroscope and touchscreen, or augmented with a joystick attachment that allows the phone to mimic a gaming controller. That app also includes what TobyRich refers to as its “interactive flight school” and a few preprogrammed commands allowing the plane to autonomously perform stunts like loops. In addition, the app provides three flight modes: a conventional Airplane mode; a slow-flying nose-high Helicopter mode; and a Hover mode, which positions the plane in full vertical orientation suspended by the prop. The plane is completely flight-ready and requires only charging of the flight battery, which takes about 20 minutes. The viewscreen takes about an hour to charge but is not required for basic (non-FPV) flight.
Aerial Recap
The SmartPlane Pro is compact. With a wingspan of just 30cm (11.8 inches) and an all-up weight of just 34g (about 1.2 oz.) the plane needs calm air to fly successfully regardless of the flight mode. TobyRich claims that it can be flown indoors, but given its speed and the smartphone interface, I would recommend against that—at least until you’ve become familiar with its responses. I flew mine with a Samsung Galaxy S7, and the level of control with a smartphone, while straightforward, is not particularly smooth. The suction-cup joystick attachment gives you slightly more precision, but the rudder and elevator actuators are not proportional and the control orientation is unconventional. The throttle is adjusted via the touchscreen under your left thumb, while elevator and rudder are via the joystick button to the right. Double-tapping your throttle finger switches to Heli mode, while Hover mode is accessed via a flip motion—which means you should land to switch to it. I got about five minutes of flight time. That can be extended to perhaps 10 to 12 minutes if you refrain from using the more power-hungry Heli and Hover modes.
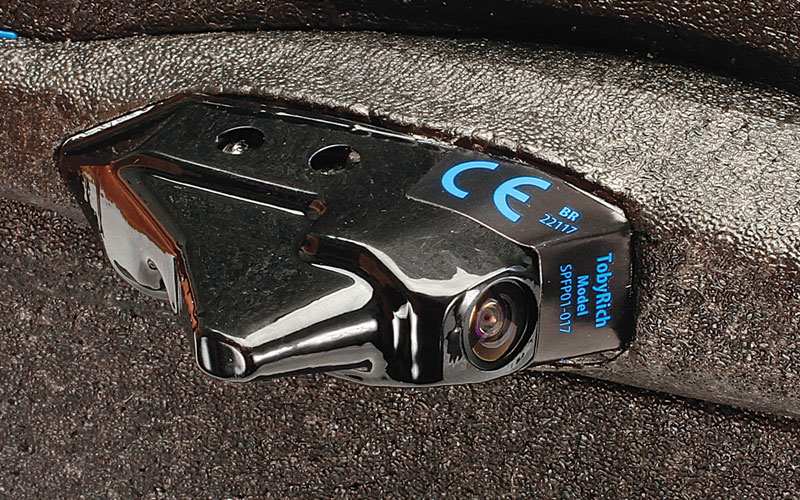
The 720×576-pixel camera comes mounted to the belly and is protected by a plastic housing.
Aerial Recap
The SmartPlane Pro is compact. With a wingspan of just 30cm (11.8 inches) and an all-up weight of just 34g (about 1.2 oz.) the plane needs calm air to fly successfully regardless of the flight mode. TobyRich claims that it can be flown indoors, but given its speed and the smartphone interface, I would recommend against that—at least until you’ve become familiar with its responses. I flew mine with a Samsung Galaxy S7, and the level of control with a smartphone, while straightforward, is not particularly smooth. The suction-cup joystick attachment gives you slightly more precision, but the rudder and elevator actuators are not proportional and the control orientation is unconventional. The throttle is adjusted via the touchscreen under your left thumb, while elevator and rudder are via the joystick button to the right. Double-tapping your throttle finger switches to Heli mode, while Hover mode is accessed via a flip motion—which means you should land to switch to it. I got about five minutes of flight time. That can be extended to perhaps 10 to 12 minutes if you refrain from using the more power-hungry Heli and Hover modes.
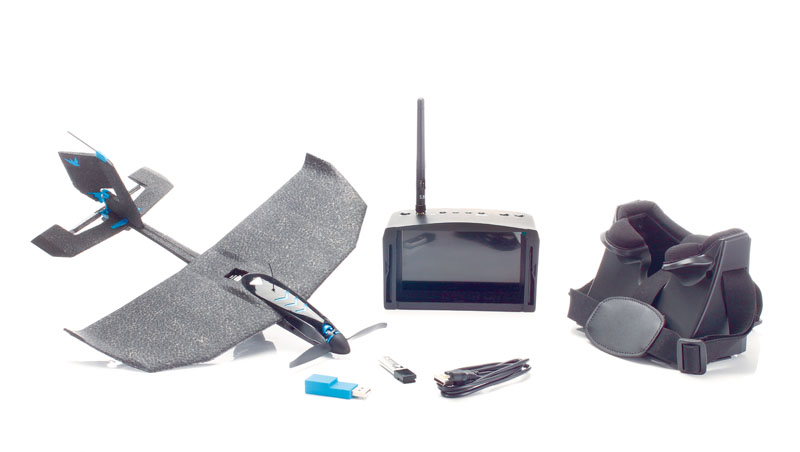
The Pro FPV version of the SmartPlane includes the plane, battery, charge cords, a display screen linked to the pod-mounted camera, and a headset for turning the screen into FPV goggles.
Bottom Line
There is no building involved, so you’re only a battery charge away from your initial flight. The Durinum foam is sturdy, so it will tolerate quite a bit while you get the feel of the plane. But you’ll want to get your bearings in a wide open space, and some previous flying experience is highly recommended.